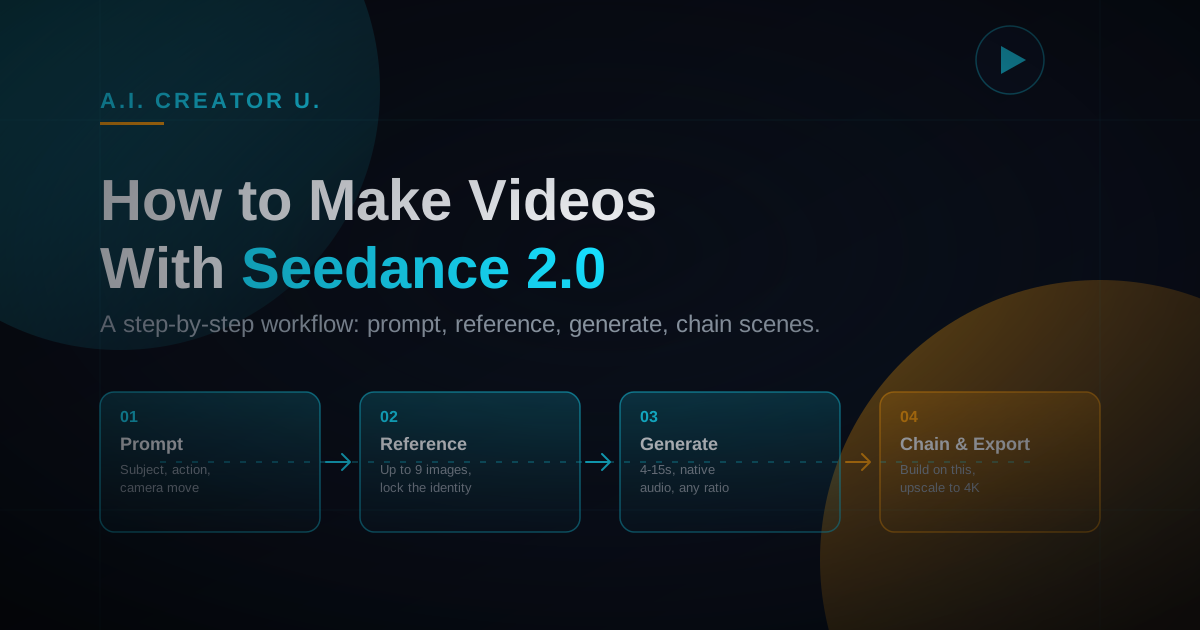
Quick answer: To make a video with Seedance 2.0, open the Create Video tool, pick a text, image, video, or audio input, write a specific prompt (subject, action, camera move, setting), add up to 9 reference images or 3 reference clips if you want visual consistency, set your duration (4 to 15 seconds), aspect ratio, and resolution, then generate. Use the Fast tier for drafts and iteration, switch to Quality when you need 1080p or 4K for a final cut, and use "Build on this" to chain scenes by feeding the last frame of one clip into the next.
That's the whole loop. Everything below is what actually makes the difference between a video that looks like a demo reel and one that looks like it was cut by someone who knows what they're doing.
What you need before you open the tool
Nothing complicated. Seedance 2.0 in Create Video works from four input types, and you don't need all of them:
- Text only: a prompt is enough to generate a scene from scratch.
- A reference image: turns a still into motion, keeps the subject's face and outfit locked.
- A reference video: for style transfer or motion matching.
- A reference audio clip: for lip sync or matching pacing to a beat.
You can also stack these. Seedance 2.0 in the Fast/Quality tier accepts up to 9 reference images, 3 reference videos, and 3 reference audio clips in a single generation, plus separate first-frame and last-frame slots if you want to control exactly where a shot starts and ends. Most people never need all of that at once, but knowing the ceiling matters when you're trying to keep a character or product consistent across a sequence of clips.
Step-by-step: how to make a video with Seedance 2.0
1. Choose your mode
In Create Video, pick Seedance 2 from the model picker. You'll see a Fast/Quality toggle: Fast is cheaper and quicker for testing an idea, Quality unlocks higher resolution and holds up better under scrutiny. Start on Fast. Nobody nails a prompt on the first try, and burning credits on a slow, expensive render before you've confirmed the shot works is how people quit before they get good results.
2. Write the prompt like a shot list, not a wish list
The single biggest gap between amateur and usable output is specificity. "A woman walking on a beach" gives the model too much room to guess. "A woman in a red coat walks along a foggy beach at sunrise, camera tracking her from the side at eye level, waves breaking behind her" gives it a job. Name the subject, the action, the setting, the lighting, and the camera behavior. Seedance 2.0 respects camera language directly in the prompt, so words like "dolly in," "slow pan left," "handheld," or "static wide shot" actually change the output instead of getting ignored.
If you want dialogue or a sound cue baked in, say so in the prompt or drop in a reference audio clip. Seedance 2.0 generates audio natively in the same pass as the video, so you're not bolting a voiceover on afterward in a separate tool.
3. Add references if you need consistency
Text-to-video is fine for a single standalone clip. The moment you need the same character, product, or setting across multiple shots, add reference images. Upload a clear shot of the subject, describe what should change (setting, action, camera angle), and Seedance 2.0 holds the identity while it changes everything else. This is the actual workflow behind most of the "how is this AI video so consistent" posts you've seen: it's not one long generation, it's several short ones anchored to the same reference.
4. Set duration, aspect ratio, and resolution
Duration runs from 4 to 15 seconds per generation. Aspect ratios cover the usual spread: 16:9 and 21:9 for landscape/cinematic, 9:16 for TikTok and Reels, 1:1 and 4:3/3:4 for square and vertical-adjacent formats. For resolution, Fast tier caps at 720p, which is plenty for testing and even for a lot of finished social content. Quality tier unlocks 1080p and 4K, which is what you want for anything going on a bigger screen or getting scrutinized frame by frame.
5. Generate, then actually watch the whole clip
Don't judge a generation off the thumbnail. Watch it start to finish before deciding it's a keeper or a redo. Motion artifacts and identity drift tend to show up mid-clip, not in the first frame.
6. Extend the scene instead of starting over
If a clip ends on a strong frame and you want to keep going, use "Build on this." It grabs the last frame of your current clip and feeds it back in as the starting point for the next generation, so your sequence flows instead of jump-cutting between disconnected shots. This is how you get a 30, 45, or 60-second sequence out of a model that generates in 4-to-15-second chunks: you're not making one giant video, you're chaining short ones with continuity.
7. Upscale for the final pass
If you generated at 720p to save credits during iteration and now need a sharper final file, you don't have to regenerate. Run the finished clip through the upscaler to 1080p or 4K after the fact. Keep your editing and iteration cheap, then spend the higher-resolution pass only on the take you're actually keeping.
A worked example: turning a product photo into a 15-second ad clip
Here's what the full loop looks like end to end, since the step list above is abstract until you've done it once.
Say you're selling a ceramic mug and you have one clean product photo on a white background. You upload that photo as your reference image, then write a prompt like: "The mug sits on a wooden kitchen counter, steam rising from fresh coffee inside, morning light through a window behind it, slow dolly in, shallow depth of field." No mention of the mug's color or shape in the prompt, the reference image already locks that down. You set duration to 6 seconds, aspect ratio to 9:16 for TikTok, resolution to 720p on the Fast tier, and generate.
You watch the result. Maybe the steam looks weak, or the dolly move is too fast. You adjust the prompt ("gentle dolly in, more visible steam") and regenerate on Fast again, still cheap. Once the shot looks right, you either call it done at 720p or run the same prompt on the Quality tier for a 1080p finish if this is going into a paid ad campaign. If you want a second shot, say a close-up of someone's hands wrapping around the mug, you generate that as a separate clip using the same reference image so the mug stays consistent, then use "Build on this" or your own editor to sequence the two clips together.
That's the entire workflow: reference for consistency, specific prompt for the parts the reference can't cover, iterate cheap, finalize once. It's the same pattern whether you're making a product ad, a talking-head intro, or a pure B-roll establishing shot.
Text-to-video vs. image-to-video vs. reference mode: which one do you actually want?
| Input type | Best for | What it locks down |
|---|---|---|
| Text only | New scenes, concept exploration, B-roll | Nothing; the model interprets everything from the prompt |
| Single reference image | Turning a product photo or portrait into motion | Subject appearance, framing at the start |
| Multiple reference images (up to 9) | Multi-shot sequences with a consistent character or product | Identity and key visual details across shots |
| Reference video | Style transfer, matching an existing camera move or pacing | Motion pattern or visual style |
| Reference audio | Lip sync, matching pacing to a soundtrack or voice line | Timing and mouth movement |
If you're starting from nothing, text-to-video is fastest. If you already have product photography or a headshot, image-to-video will look more polished than trying to describe your subject into existence. If continuity across a series of clips matters more than anything else, references are non-negotiable, plain text prompting alone won't hold a face or a logo steady across five separate generations.
Common mistakes that waste credits
Overloading a single prompt. Trying to cram three actions, two camera moves, and a scene change into one 8-second generation usually produces something muddled. Split it into two clips and stitch them with "Build on this" instead.
Skipping the Fast tier. Jumping straight to Quality/4K before you've confirmed the prompt and composition work means paying full price to find out your camera direction didn't land. Iterate cheap, finalize expensive.
Vague camera direction. "Cinematic" isn't a camera move. "Slow dolly in, shallow depth of field" is. The more concrete the language, the more the output looks intentional instead of accidental.
Ignoring aspect ratio until the end. Pick your target platform first. A 16:9 clip cropped down to 9:16 after the fact loses framing you controlled for in the prompt. Set the ratio before you generate, not after.
Mixing too many reference images with conflicting details. Nine reference images is a ceiling, not a target. Stacking five loosely related images and hoping the model figures out which details matter tends to produce a muddled blend. Use only the references that actually need to be locked down (usually one to three) and let the prompt handle the rest.
What does it cost?
Seedance 2.0 in Create Video runs on the same credit-based system as the rest of A.I. Creator U, priced by duration, resolution, and whether audio is included. Fast-tier drafts cost less than Quality-tier 1080p/4K finals, which is exactly why the iterate-cheap-then-upscale workflow above matters for your credit balance, not just your time. For the actual current numbers (cost per second, resolution tiers, subscription vs. pay-as-you-go), see our Seedance 2.0 pricing breakdown, we keep that page current rather than repeating figures here that go stale.
New accounts also start with free credits to test the workflow before committing to anything, no card required to try your first few generations.
Seedance 2.0 quick reference
| Spec | Detail |
|---|---|
| Duration per generation | 4 to 15 seconds |
| Aspect ratios | 21:9, 16:9, 4:3, 1:1, 3:4, 9:16 |
| Reference images | Up to 9 |
| Reference videos | Up to 3 |
| Reference audio clips | Up to 3 |
| Start/end frame control | Yes |
| Resolution (Fast tier) | 480p, 720p |
| Resolution (Quality tier) | 480p, 720p, 1080p, 4K |
| Native audio | Yes, generated in the same pass |
| Face support | Real faces allowed |
(Specs pulled from the live Create Video model configuration; ByteDance has separately announced a newer Seedance 2.5 with native 30-second clips, but that's a different model than what's live in Create Video today, worth knowing about if you see it referenced elsewhere, not something to expect in this tool yet.)
FAQ
Do I need any editing experience to use Seedance 2.0? No. The prompt does the heavy lifting. Editing skill helps once you're chaining multiple clips together with "Build on this," but a single generation just needs a clear prompt and, optionally, a reference image.
Can I add my own voice or a cloned voice to a Seedance 2.0 video? Seedance 2.0 generates audio natively based on your prompt or a reference audio clip. If you want a specific cloned voice reading a script, generate that separately in the Audio Studio with Seed Audio, then bring it in as a reference or add it in post.
Why does my generated video not look like my reference image? Usually the prompt is fighting the reference instead of building on it. If your reference is a person in a blue jacket and your prompt says "she's wearing a red dress," the model has to choose, and results get unpredictable. Keep the prompt focused on what should change (setting, action, camera) and let the reference handle appearance.
How long can a finished video actually be if each generation caps at 15 seconds? As long as you're willing to chain clips. Use "Build on this" to carry the last frame of one generation into the next, generation after generation, and you can build sequences well past a minute. Most short-form content is built this way rather than as one continuous render.
Is Seedance 2.0 free to use? No, Seedance 2.0 itself isn't a free model on any platform, but new accounts here start with free credits to test it out, and the separate Seedance 2 Mini tier does carry ongoing free-tier access at lower resolutions. Full breakdown in the pricing guide.
Ready to try it? Open Create Video and run your first generation on the Fast tier, it costs less to find out what works than to guess. If you're still deciding whether Seedance 2.0 is the right model for what you're making, start with what Seedance 2.0 actually is and how it compares, or if you're outside mainland China and just need the fastest path to using it at all, see how to access Seedance 2.0 without a Chinese account. For the bigger picture on AI video tools generally, the AI video generation guide covers where Seedance fits among the rest of the field.