A still photo and a sentence of instructions. That's the entire input for image-to-video AI, and it's the fastest way to get a usable video clip when you don't have a camera, an actor, or the time for a full production.
Quick answer: Image-to-video AI takes a single photo (or several reference images) and generates motion around it, camera movement, a subject turning to speak, product rotation, a scene coming alive, guided by a text prompt. Upload an image to a model like Seedance 2.5, Kling 3.0, or VEO 3.1, describe the motion you want in plain language, and you get a 4 to 15 second clip in a few minutes. The best results come from clean source images, one or two motion ideas per prompt (not five), and picking a model that matches your subject: faces and product shots want different tools than sweeping cinematic scenes.
The rest of this walkthrough covers how it actually works, which model to pick for which job, and the exact steps to go from photo to finished clip. For the bigger picture on where image-to-video fits alongside text-to-video and video editing, see our AI Video Generation guide.
What Is Image-to-Video AI, Exactly?
Text-to-video AI starts from nothing but words, so the model has to invent the entire scene: the subject, the lighting, the composition, all of it. Image-to-video starts from something real. You already decided what the subject looks like, how it's framed, what the lighting is doing. The model's only job is to figure out what happens next.
That's a much easier problem, and it shows in the output. Image-to-video clips tend to look more consistent and less "AI-generated" than pure text-to-video, because half the creative decisions are already locked in by your source photo. It's why product sellers lean on it so heavily: a real product photo animated into a video ad keeps the product looking like the actual product, instead of an AI's best guess at what your product might look like.
How Does It Actually Work?
Under the hood, most image-to-video models are diffusion models trained on huge datasets of video. Training taught the model what motion looks like frame to frame, how a fabric moves, how light shifts as a camera pans, how a person's expression changes mid-sentence. When you feed it a still image, it treats that image as a fixed anchor point and predicts a plausible sequence of frames flowing out from it, guided by whatever you wrote in the prompt.
That's also why prompting matters more than people expect. The model isn't "editing" your photo. It's generating an entirely new video that starts from your photo's pixels and then improvises motion based on your instructions. Vague or contradictory instructions produce vague or contradictory motion.
What Can You Actually Control?
More than just "animate this." Depending on the model, image-to-video generation gives you:
- The prompt, what should move, how, and in what direction.
- Reference images, some models take one image, others take up to 30 (more on that below), letting you lock in a subject from multiple angles or blend elements from separate shots.
- First and last frame, upload a starting image and an ending image, and the model fills in everything between them. Useful for a product turning to reveal a label, or a scene transition that has to land on an exact final shot.
- Duration, resolution, and aspect ratio, how long the clip runs and what shape it's cropped to.
- Audio, several current models generate native audio (voice, ambient sound, even lip sync) in the same pass as the video, so you're not bolting on a separate voiceover step.
Which Models Handle Image-to-Video Right Now?
Not every model treats images the same way. Some want a single hero shot. Others let you stack references and steer with first/last frame control. Here's what's actually live in Create Video today:
| Model | Reference images | First/last frame | Duration | Notes |
|---|---|---|---|---|
| Seedance 2.5 | Up to 30, plus video and audio refs | Yes | 4 to 30 sec | Flagship tier. Handles the widest range of multimodal references and supports prompt-driven editing on top of image-to-video. |
| Seedance 2 (Fast/Mini) | Up to 9 | Yes | 4 to 15 sec | The everyday workhorse. Strong motion, native audio, cheaper Mini tier for testing ideas fast. |
| MiniMax H3 | Up to 9 | Yes | 4 to 15 sec | Strong on physical motion and prompt adherence, up to 2K output. |
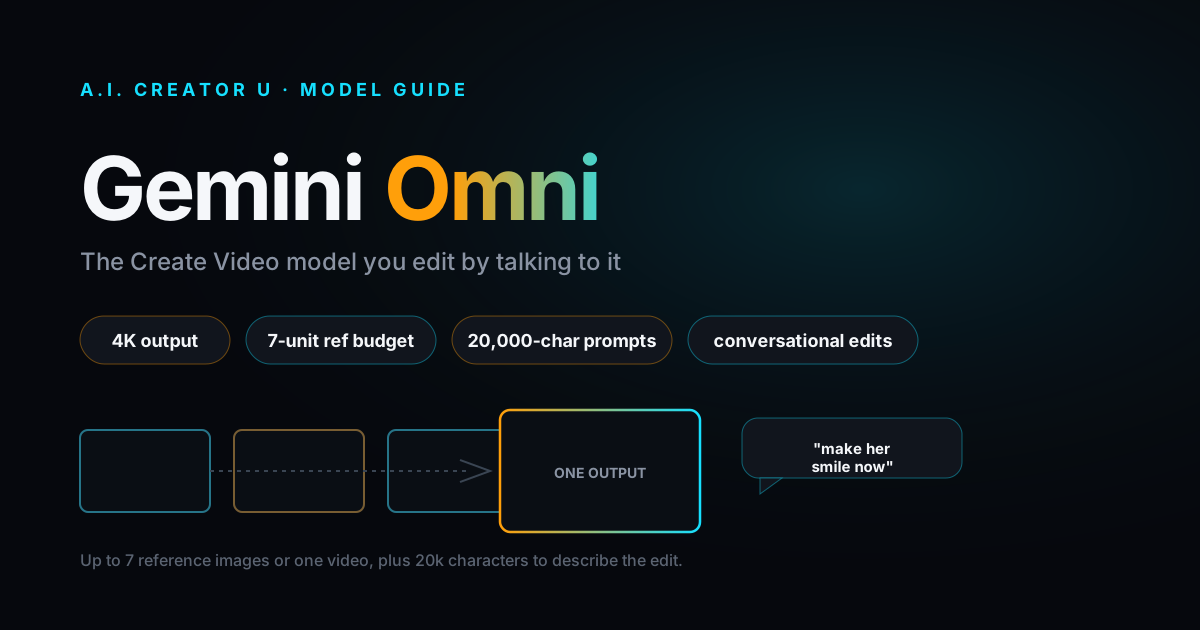
| Gemini Omni | Up to 7 | No | 4, 6, 8, or 10 sec | Built for character consistency across edits and conversational follow-up changes. |
| HappyHorse | Up to 9 | No | 3 to 15 sec | Realistic animation with strong multilingual lip sync, native sound. |
| Kling 3.0 | 1 | Yes | 3 to 15 sec | Best for polished, multi-shot sequences with consistent characters. |
| Kling 2.6 | 1 | No | 5 or 10 sec | Reliable, affordable, straightforward image-to-video with optional audio. |
| Grok Imagine 1.5 | 1 (required) | No | 1 to 15 sec | Purpose-built for image-to-video specifically. Low cost, subtle motion, decent lip sync. |
| VEO 3.1 (Lite/Fast/Quality) | 2 to 3 | No | Fixed per clip | Google's model, strong on realistic physics and cinematic camera movement. |
If you're not sure where to start: Seedance 2 Fast covers most everyday cases, Grok Imagine 1.5 is the cheapest dedicated option, and Seedance 2.5 or Kling 3.0 are where you go when a shot needs to look genuinely polished.
Step-by-Step: Turn a Photo Into a Video
- Pick your source image. Sharp, well-lit, and cropped close to the aspect ratio you'll publish in (9:16 for Reels and TikTok, 16:9 for YouTube). A busy, cluttered background gives the model more to interpret and more room to get it wrong.
- Open Create Video and upload the image. Drop it into the reference slot. If the model supports multiple references, add a second or third angle of the same subject for better consistency.
- Write a focused prompt. Describe one or two motion ideas, not five. "Slow push-in as she turns toward camera and smiles" works. "Camera orbits while she dances, confetti falls, lighting shifts to sunset, and a logo spins in" does not, the model has to prioritize, and it usually prioritizes badly.
- Set duration and aspect ratio. Shorter clips (4 to 6 seconds) are more forgiving. Longer clips give motion more time to drift from what you intended.
- Turn on audio if the model supports it. Native audio in the same generation pass saves a separate voiceover or sound-design step later.
- Generate, then judge the first result honestly. If the motion looks frantic or the subject warps, that's almost always a prompt problem, not a model problem. Cut the prompt down to the single most important motion and regenerate.
- Use first/last frame if you need an exact ending. On models that support it, upload a second image as the last frame so the clip lands precisely where you want, instead of drifting somewhere close.
All seven steps happen in one place: Create Video has every model in this guide behind a single picker, so you're not juggling separate tools or accounts per model.
How Do You Write a Prompt That Actually Animates the Image?
The single biggest mistake is describing the image instead of the motion. The model already has the image. It doesn't need you to re-describe what's in frame, it needs to know what should happen that isn't already true in the still photo.
Weak prompt: "A woman in a red dress standing in a kitchen holding a coffee mug." That's just a description of the photo you already uploaded. The model has nothing to animate.
Strong prompt: "She lifts the mug, takes a sip, and smiles slightly as steam rises. Camera holds steady, slow shallow-focus pull." Now there's an action, a small emotional beat, and a camera instruction, three concrete things for the model to render.
For product shots, name the physical motion directly: "Product rotates 180 degrees on a turntable, light reflects across the surface." For talking-head or spokesperson clips, describe the delivery, not just the words: "Speaks directly to camera with confident, upbeat energy, gestures once at the halfway point."
First Frame vs. Last Frame: When Do You Need Both?
Standard image-to-video only anchors the start. The model is free to end the clip wherever the motion naturally lands, which is fine for most social content but a problem when you need an exact final shot, a product label facing forward at the end, a loop that has to match its own starting frame, or a transition that has to land precisely for editing.
That's what first/last frame control is for. You supply two images (the state at the beginning and the state at the end), and the model interpolates everything between them using both as anchors. It's supported on Seedance 2.5, Seedance 2, MiniMax H3, and Kling 3.0 right now. Use it any time the destination shot matters as much as the starting one, seamless loops for social, before/after product reveals, or scene-to-scene transitions in a longer edit.
Common Mistakes That Ruin an Image-to-Video Clip
- Low-resolution or heavily compressed source images. The model amplifies whatever detail (or lack of it) is already in the photo.
- Stacking too many motion ideas in one prompt. Pick the one thing that matters most for this clip. You can always generate a second clip for a different beat.
- Ignoring aspect ratio until after generation. Cropping a finished clip after the fact loses framing you paid credits to generate. Set the ratio before you run it.
- Ordering a duration longer than the motion needs. A 4-second clip of someone turning to camera looks natural. Stretch that same motion to 12 seconds and it starts to drift and loop awkwardly.
- Skipping first/last frame when the ending matters. If you need a specific final shot, don't leave it to chance, lock it in.
What's the Best Model for Image-to-Video Right Now?
Honestly, it depends on the job, but if forced to pick one default, Seedance 2 Fast earns its place as the everyday option: strong motion quality, native audio, up to 9 reference images, and first/last frame support, without the premium cost of the 2.5 tier. Reach for Seedance 2.5 or Kling 3.0 when a shot has to look genuinely polished, a hero product video or a client deliverable where a little extra render time is worth it. Grok Imagine 1.5 earns a place too, purely on cost, for quick tests and drafts where you're iterating on an idea before committing real credits to the final version.
For a full head-to-head on how these models actually perform side by side, see our Best AI Image-to-Video Tools breakdown, and if you want the full model comparison across use cases, Seedance 2 vs. VEO vs. Kling covers where each one wins.
Ready to try it? Create Video has every model above in one picker, no separate accounts or API keys per provider, and new accounts get up to 16 free credits (6 to start, 10 more for finishing the quick tour) to test render quality before spending anything.
FAQ
Does image-to-video AI work with any photo? Mostly, yes, but quality in equals quality out. Sharp, well-lit images with a clear subject and simple background animate more reliably than dark, blurry, or cluttered ones. If a face is heavily obscured or the subject is tiny in frame, the model has less to work with and the motion tends to look less convincing.
How long does it take to generate a video from an image? Most models finish a clip in a few minutes; faster tiers like Seedance 2 Mini or Grok Imagine 1.5 run closer to 2 to 5 minutes, while higher-quality models like Seedance 2.5 or Kling 3.0 can take longer for a more polished result.
Can I add my own voice or a cloned voice to an image-to-video clip? Some models generate native audio in the same pass, and for cloned narration or more control over voice, pairing your video with Seed Audio in the Audio Studio gives you a dedicated voice track you can sync separately.
What's the difference between image-to-video and video-to-video? Image-to-video starts from a single still photo and generates new motion around it. Video-to-video starts from an existing video and transforms or restyles it, keeping the original motion but changing the look, the character, or the style layered on top.
Do I need a specific aspect ratio for TikTok or Reels versus YouTube? Yes, set it before generating rather than cropping after. Vertical (9:16) suits TikTok, Reels, and Shorts; horizontal (16:9) suits YouTube and most ad placements. Cropping a finished clip after generation throws away framing you already paid for.