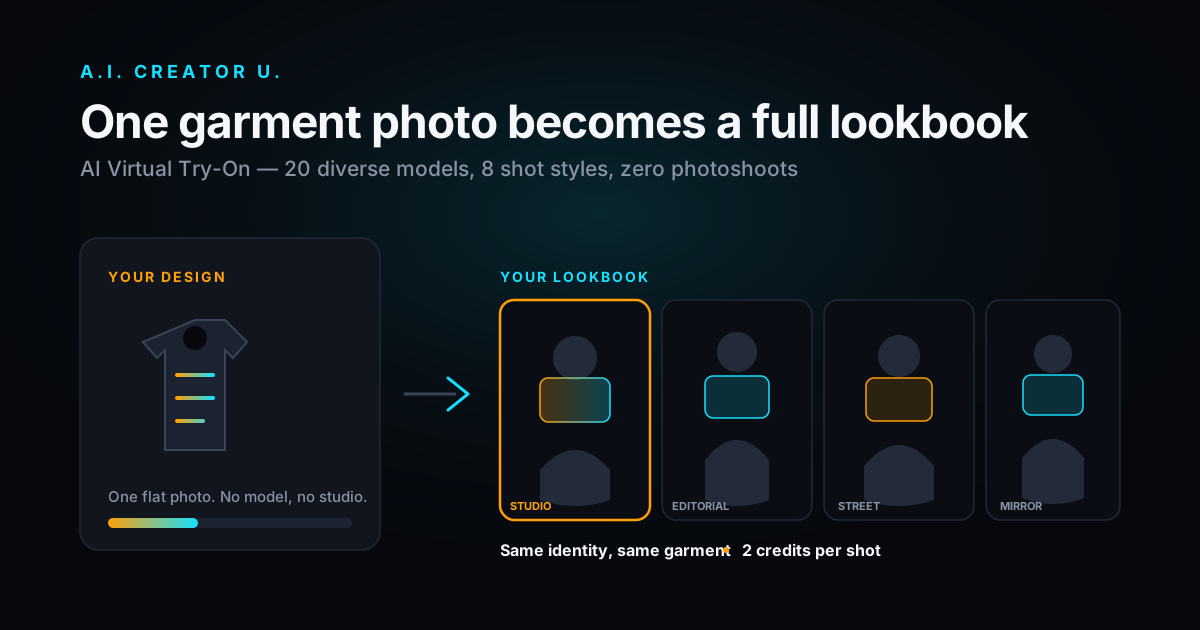
Quick answer: AI virtual try-on lets apparel sellers put a real-looking, identity-consistent model in a garment without booking a model, a studio, or a photographer. You upload one flat photo of the design, the AI reads the print, cut, and color, then dresses a model in it across whatever shots you need: clean e-commerce catalog shots, editorial poses, or candid mirror-selfie and street-style content. In A.I. Creator U.'s Studio Zero, this lives in the Try-On tab: pick from 20 diverse stock models (or your own AI Twin character), pick from 8 shot styles, and generate a full lookbook for 2 credits per image.
The model day-rate problem every small apparel brand hits
You designed a hoodie. You have a flat-lay photo, maybe a mockup. And now you're stuck, because "flat-lay on a hanger" doesn't sell. Shoppers want to see the garment on a body: how it drapes, how it fits, what it looks like in motion. That means a model, a photographer, a studio or a location, and usually a full day. Even a scrappy version of that shoot runs $500 to $1,500+ once you add hair, wardrobe styling, and retouching. For a brand testing five SKUs a month, that math doesn't work.
This is the gap AI virtual try-on closes. Not the customer-facing kind where a shopper uploads their own selfie and previews a fit (that's a separate category, more on that below), but the brand-side kind: you generate the on-model catalog and lifestyle photography itself, from a flat design, in minutes.
What AI virtual try-on actually is (and the version that isn't for you)
"AI virtual try-on" gets used for two genuinely different products, and mixing them up wastes your time.
Customer-facing try-on is a shopping widget: a shopper on your site or in an app uploads a photo of themselves (or picks an avatar), and the tool renders the garment on their body so they can gauge fit before buying. Google Shopping and ASOS both shipped versions of this in 2026, aimed at shoppers, not brands.
Brand-side model generation is what you use to produce your marketing images in the first place: catalog photos, lifestyle scenes, ad creative, lookbooks. There's no shopper in the loop. You upload the garment once and generate as many on-model shots as your campaign needs.
Studio Zero's Try-On tab is the second kind. It's built for the seller who needs product photography, not a fitting-room feature for their storefront.
Why sellers are actually switching to this
The traditional workflow (hire a model, book a studio, shoot, retouch, repeat every time you add a color or a SKU) doesn't scale, and the return-rate math on apparel is brutal without good on-model imagery. Online apparel return rates commonly sit in the 30 to 40 percent range, and fit uncertainty is the biggest driver. DRESSX's 2026 Virtual Try-On Intelligence Report, based on over a million fashion shoppers, found that people who engaged with try-on imagery converted roughly 50 percent more often than those who didn't, and separately reported returns dropping by double digits when shoppers could see a garment on a body before buying. Multiple retailers in that same report cited conversion lifts in the 20 to 40 percent range after adding real on-model visuals. None of that requires the shopper-facing widget. Static, well-shot on-model photography gets most of that lift on its own, and that's exactly what brand-side generation produces.
The honest caveat: these are industry-reported figures from a vendor study, not something we measured ourselves, so treat them as directional, not gospel. But the underlying logic checks out: a flat-lay doesn't answer "how will this look on me," and a photo on a real body does.
How to turn a flat garment photo into model shots
Here's the actual workflow inside Studio Zero. It's five decisions, and the tab only shows up when your project looks like apparel (a shirt, dress, hoodie, hat, whatever), so you won't see it cluttering up a session for supplements or gadgets.
- Upload your garment. One clean, flat photo of the design is enough: a product shot, a mockup, or a photo laid on a table. Studio Zero reads the cut, color, pattern, and any printed graphic or logo from that single image.
- Choose your models. Pick from a roster of 20 diverse stock models spanning gender, age range, ethnicity, and body type, from petite to plus-size to a grandfatherly sixty-something. You can select more than one at a time to build a size-inclusive lookbook in one pass. If you've already built a character in Character Studio (your own AI Twin, or a custom persona), you can dress that character instead, so a creator or founder can literally model their own line.
- Choose your styles. Eight shot recipes split into two groups. Studio side: a clean white-seamless E-Comm catalog shot, a magazine-style Editorial pose, a tight Fit Detail crop on the chest and shoulders, and a Back View for anything with a back print. Candid side: Street Style walking shot, Mirror Selfie (the UGC bedroom-mirror look), Café Lifestyle, and Golden Hour outdoor. Three one-click packs cover the common cases: "Website pack" grabs all four studio shots, "Social pack" grabs all four candid shots, and "Everything" grabs all eight.
- Set the ratio and quantity. Each shot has a sensible default aspect ratio (portrait for most, square for the detail crop, vertical for the mirror selfie), or you can lock one ratio across the board. Pick how many variations per model-and-shot combination you want.
- Check the price, then generate. The exact cost sits right above the button before you commit: (models × styles × variations) × 2 credits. Two models on the Website pack at one variation each is 8 images for 16 credits. Nothing charges until you hit generate, and every model stays identity-locked, meaning the same face, body, and skin tone across every single shot so your lookbook doesn't look like eight different people.
The compositing itself is doing more than a generic "put clothes on a photo" prompt. The garment reference and the model reference are treated as two separate channels: one locks the model's identity (face, body, skin tone, age), the other locks the garment's exact design, so the model's face doesn't drift between shots and the print on the garment doesn't get reinterpreted, mirrored, or redrawn. That distinction is the difference between a usable lookbook and a slot machine where every image is a different person wearing a slightly different shirt.
Once you have the shots, they land in the same gallery as the rest of your Studio Zero project, star your favorites, regenerate anything that missed, and export a ZIP. And because they're standard project images, you can carry the strongest one straight into the Ads tab to turn it into a video ad without starting a new project.
Try Studio Zero's Try-On tab to see it on your own product.
The real cost comparison
<table> <thead><tr><th>Approach</th><th>Cost</th><th>Turnaround</th><th>What you actually get</th></tr></thead> <tbody> <tr><td>Hire a model + photographer</td><td>$500 to $1,500+ per shoot</td><td>Days to weeks (booking, shoot day, retouching)</td><td>Real photography, but one look, one session, expensive to repeat per SKU or color</td></tr> <tr><td>Stock photo sites</td><td>$10 to $50 per image, or subscription</td><td>Minutes</td><td>Generic models who never actually wore your garment; print and fit are wrong</td></tr> <tr><td>Generic AI image editor</td><td>Free to cheap per image</td><td>Minutes</td><td>No identity lock across shots, print/logo fidelity is a coin flip, usually one shot at a time</td></tr> <tr><td>Studio Zero Try-On</td><td>2 credits per image (~$0.10 to $0.20 depending on plan)</td><td>Minutes</td><td>Your exact garment, consistent model across a full multi-angle lookbook, studio and candid styles</td></tr> </tbody> </table>
The stock-photo row is worth dwelling on for a second, because it's the trap a lot of small brands fall into: a pretty model wearing a shirt that isn't yours doesn't build trust, it just decorates the listing. Shoppers notice, even subconsciously, when the "product photo" clearly wasn't your product.
Where this fits if you're not just doing apparel
If your session isn't detected as apparel (you're selling a gadget, a supplement, home goods), the Try-On tab won't show up, and that's intentional. It's purpose-built for garments, where a model's fit and drape genuinely matter to the buying decision. For non-apparel products, Studio Zero's Product tab (multi-style photography around the object itself) and Ads tab (turning a photo into a video ad, covered in our product-photo-to-video-ad guide) are the right tools instead.
Mistakes that waste a generation
Uploading a mockup with a fake model already in it. The garment reference works best as a flat or ghost-mannequin shot, not a photo of someone else already wearing it. Two people in the reference confuses which one is "the model" and which is "the garment."
Skipping the back view for anything with a back print. If your design has a graphic on the back, generate the Back View shot deliberately. It's easy to forget and then wonder why your listing only shows the front.
Picking one model and calling it done. Size and identity inclusivity isn't just a nice-to-do, it directly affects conversion because shoppers convert better when they see someone who looks like them wearing the product. The roster spans plus-size, petite, and a wide age range specifically so you're not stuck with one narrow look.
Not checking the price line before generating. It's shown clearly (models × styles × variations × credits) for a reason. Running the "Everything" pack across four models is 32 images before you've thought about it. Start with one model and the Website pack, review, then scale up.
FAQ
Do I need a real model or photo of a person to use AI try-on? No. You only need one clean photo of the garment itself. Studio Zero supplies the models, either from the built-in diverse roster of 20 or your own Character Studio persona if you've built one.
Is this the same as the "try before you buy" widget shoppers use on some sites? No, and this is the mix-up worth avoiding. That's customer-facing try-on, where a shopper uploads their own photo to preview fit. Studio Zero's Try-On generates your marketing and catalog photography up front, before any shopper is involved.
Will the print or logo on my garment come through accurately? That's the part the tool is specifically built to preserve. The garment channel is locked separately from the model channel, so placement, scale, and orientation of any graphic, logo, or text carry over instead of getting redrawn or mirrored. Complex, high-contrast prints tend to render more reliably than very fine text; always review the result before publishing.
Can I use the same model across multiple products for a consistent brand look? Yes. Pick the same model (stock or your own AI Twin) on every project going forward and your lookbooks stay visually consistent from one drop to the next, the same way a brand would rebook a favorite model.
What does it cost to get started? Try-On generations are 2 credits per image, same as the rest of Studio Zero's photo tools. New accounts get 6 free credits at signup and up to 16 total after finishing the quick onboarding tour, enough to generate an initial set and see the quality before you commit to anything paid.
Stop waiting on a model's calendar
A flat-lay photo tells a shopper what the fabric looks like on a table. It doesn't tell them what it looks like on a person, and that's the gap that kills conversion on apparel listings. Studio Zero's Try-On tab closes it without a casting call: upload the design, pick your models and styles, and you've got a full lookbook before your coffee's cold. If you're building out the rest of your ad stack too, pair it with our guides on turning a product photo into a video ad and the broader playbook for AI video ads that convert, or check the best UGC tools for creators if you're building out a creator-style content mix alongside your on-model photography.