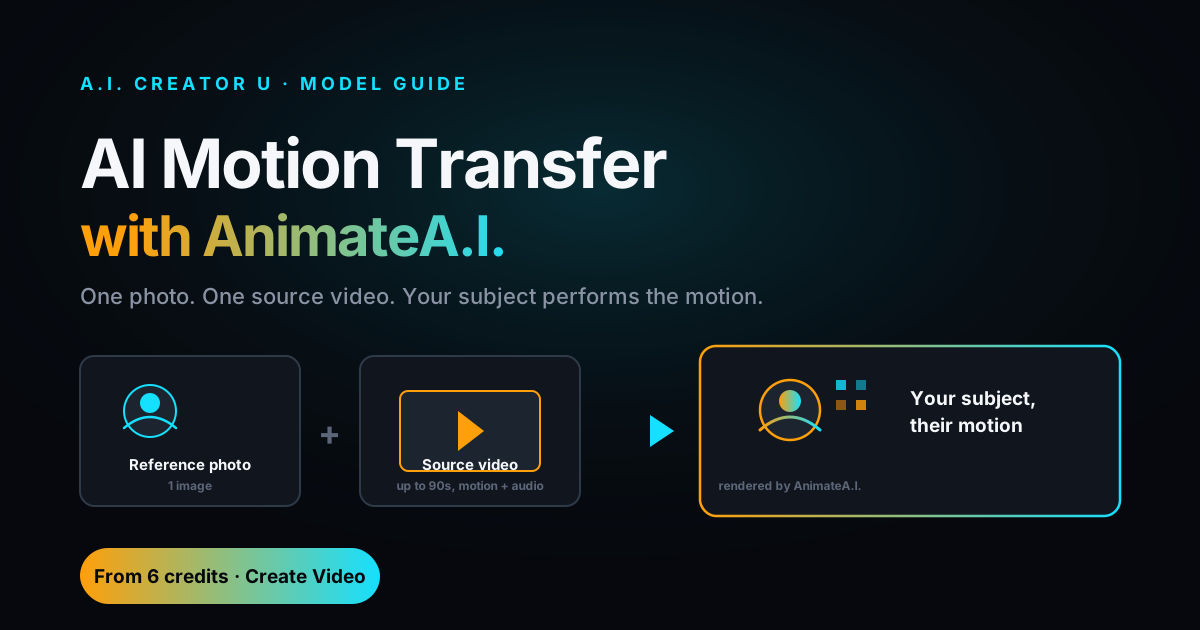
Upload one photo. Upload one video of someone else moving, talking, dancing, whatever. Get back your photo doing exactly what they did, down to the exact expression and timing, audio included. That's AI motion transfer, and it's a genuinely different trick than the text-to-video generation most people think of when they hear "AI video."
Quick answer: AI motion transfer takes the motion, expression, and (optionally) audio from a source video and applies it to a completely different reference image. In A.I. Creator U's Create Video tool, this is the AnimateA.I. model: upload one reference photo, one source video (up to 90 seconds), pick 720p or 1080p, and it renders your photo performing the source video's motion. Pricing runs from 6 credits for a 10-second 720p clip up to 90 credits for a full 90-second 1080p clip. No prompt writing required.
What Is AI Motion Transfer, and Why Isn't It Just "Face Swap"?
Face swap tools replace a face in an existing video with another face, frame by frame. The camera move, the background, the body, all of that stays exactly as it was in the original clip. It's a swap, not a performance.
Motion transfer is a different job. You give it two completely separate inputs: a still reference image (your subject) and a source video (someone else's performance). The model reads the motion, the facial expression, the timing, sometimes the audio, from the source video, then generates a brand-new clip of your reference subject performing that same motion. The output isn't a modified version of the source video. It's a new video built around your photo.
That distinction matters for what it's actually good for. Face swap is a novelty effect. Motion transfer is closer to a production tool: it's how you get a character, a product mascot, an AI twin, or a static illustration to move like a real performer without hiring one, without mocap, and without animating a single keyframe by hand.
How AnimateA.I. Actually Works
AnimateA.I. is the AI Creator U implementation of this, built on Pruna's p-video-animate model and available directly inside Create Video as its own model choice. When you select it, the interface swaps to a dedicated panel instead of the usual prompt box, because there's no prompt to write. The whole job is two uploads:
- A reference image, one photo, ideally framed close to the same position the subject holds in your source video (the tool's own tooltip says this directly: match the pose roughly and the transfer looks cleaner).
- A source video, up to 90 seconds, whose motion, expression, and timing get transferred onto your reference image. The output's aspect ratio mirrors whatever your source video is shot in. There's no separate aspect ratio picker because there's nothing to pick: the source dictates it.
From there you choose a resolution (720p or 1080p), optionally type a short instruction (up to 2,000 characters, things like "preserve facial expression, match lighting"), and hit generate. You can leave the instruction blank and let the model decide, which is honestly what most people should do on a first pass. Output length matches your source video's length exactly. Generation typically lands somewhere in the 2 to 8 minute range depending on length and resolution, and the finished clip shows up in your project history the same way any other generation does.
Audio carries over by default. The source video's sound, voice, music, whatever's on the track, comes through onto the output unless you explicitly tell it to ignore audio. That's a meaningfully different workflow than most video generators, where audio is either absent or generated separately.
Step by Step: Making Your First Motion Transfer
- Open Create Video and pick AnimateA.I. from the model list. You'll see a dedicated two-upload panel replace the usual prompt field.
- Upload your reference image. One photo, one subject. If it's a character you've built in Character Studio or an AI twin, this is where that consistency pays off: the same face across dozens of motion-transfer clips.
- Upload your source video. Anything up to 90 seconds. This is the performance you're borrowing: a dance clip, a talking-head reaction, a product-in-hand demo, a walk cycle. If your clip runs long, trim it first; the tool will flag anything over the cap and block generation until you cut it down.
- Pick a resolution. 720p is cheaper and faster; 1080p costs more but holds up better if you're cutting the clip into something wider, like a YouTube video or an ad.
- Add an instruction if you want one. Optional. Something like "preserve facial expression, match lighting" nudges the render without forcing a full prompt-writing exercise.
- Generate, then check your feed. There's no inline preview while it renders; the finished video lands in your history panel on the right, same as every other model.
That's the entire workflow. No storyboard, no keyframes, no separate audio pass.
What Does It Cost?
AnimateA.I. prices off your source video's length and resolution, not off a flat per-generation rate. The formula: 720p runs $0.045 per second of source footage, 1080p runs $0.08 per second, both marked up through the platform's standard credit ratio and rounded up to the nearest whole credit. Here's what that looks like in practice:
| Source video length | 720p cost | 1080p cost |
|---|---|---|
| 10 seconds | 6 credits | 10 credits |
| 15 seconds | 9 credits | 15 credits |
| 30 seconds | 17 credits | 30 credits |
| 60 seconds | 34 credits | 60 credits |
| 90 seconds (max) | 51 credits | 90 credits |
You'll see the exact credit cost update live in the panel as soon as you upload a video, before you commit to generating. New accounts start with up to 16 free credits (a 6-credit welcome pack plus 10 more for finishing the quick onboarding tour, valid for 14 days), which is enough to test-drive a handful of short 720p clips before you need to decide whether it's worth a subscription.
Where This Actually Earns Its Keep
The obvious use case is putting a consistent character or AI twin through motion you didn't have to choreograph. Building an AI influencer or spokesperson? Feed it a dance trend, a product-unboxing gesture set, or a talking-head delivery style, and your character performs it without you touching a rig. That pairs directly with Character Studio: build the face once, then reuse it across as many motion-transfer clips as you want.
It's also a shortcut for bringing a static illustration or product mascot to life. A flat character design, a logo mascot, a drawn avatar: none of those "move" on their own, but hand AnimateA.I. a source video of a real performance and suddenly your static asset has body language.
And it's genuinely useful for salvaging footage. Got a great performance on video but the wrong subject in frame (a stand-in, a stock model, an old take of yourself you don't love)? Swap in a better reference image and keep the performance.
Ready to try it yourself? Open Create Video, pick AnimateA.I. from the model list, and run your first transfer. Free credits cover a few short test clips before you have to think about cost.
What It Won't Do (Be Honest With Yourself Here)
This is where I'll push back on the hype a little. AnimateA.I. is not a text-to-video model, and treating it like one is the fastest way to be disappointed. There's no prompt box because there's no scene to describe: the camera move, the setting, the framing, all of it comes straight from your source video. If you want a specific new scene with specific new camera work, you want Seedance, Kling, or VEO, not AnimateA.I.
It's also not built for extending a shot. Output length is locked to source length, there's no start/end frame control, no multi-shot sequencing, and no aspect ratio picker. It's a focused tool that does one job (transfer motion from A to B) and does it without the usual generation-model knobs. That focus is a feature once you know what you're using it for, and a frustration if you expected a general-purpose video generator.
A Quick Walkthrough: Character to Performance in Under 10 Minutes
Say you've built an AI twin in Character Studio, a consistent face you use across your content. You find a 12-second clip of someone nailing a specific hand gesture and expression you want your character to deliver, maybe pointing at a product, maybe a knowing smirk to camera. You don't need to write a shot description, block a camera move, or explain lighting. You upload your character's reference photo, upload the 12-second clip, leave resolution at 720p for a fast test, skip the instruction field entirely, and generate.
A few minutes later, your character is in your feed delivering that exact gesture and expression, at the exact timing of the source clip, audio included if there was any worth keeping. Total cost for that test: 6 credits, because anything under 15 seconds at 720p rounds to the flat minimum. If it looks right, you rerun at 1080p for the version you'll actually publish. If it doesn't quite land, you tweak the reference photo's framing to match the source pose more closely and try again. That iteration loop, cheap 720p tests before a 1080p final pass, is the sane way to use any per-second-priced model, and it applies just as much here as it does with a full generation model.
AnimateA.I. vs Your Other Options
If your goal is a talking character with matched lip movement to a script or audio track, you actually want Kling's AI lip sync instead: that's a narrower, purpose-built tool for syncing mouth movement to a voice track, and it'll do that specific job cleaner than a general motion transfer will.
If you're generating a brand-new scene from scratch, text-to-video or image-to-video is still the right call. MiniMax H3 is currently one of the strongest options on the platform for realistic motion and native audio when you're starting from a prompt and a reference image rather than an existing performance video. And if you're trying to decide between the platform's core generation models generally, Seedance vs VEO vs Kling breaks down which one fits which job.
Think of it this way: generation models answer "what should happen in this scene." AnimateA.I. answers "make my subject do this specific thing that already happened on camera." Different question, different tool.
FAQ
Is AI motion transfer the same thing as deepfake face swap? No. Face swap replaces a face inside an existing video and keeps everything else (camera, background, body) untouched. Motion transfer generates an entirely new video of your reference subject performing the source video's motion; it's not editing the original footage at all.
Do I need any video editing experience to use AnimateA.I.? No. It's two uploads (an image and a video) and a resolution choice. There's no timeline, no keyframing, and the optional instruction field is plain text, not a prompt-engineering exercise.
What's the longest source video I can use? 90 seconds. If your clip runs longer, trim it before uploading; the tool checks duration client-side and blocks generation until you're under the cap.
Does the output keep the original audio from my source video? Yes, by default. Audio is preserved unless you explicitly turn it off in the panel. That includes voice, music, or ambient sound on the source clip.
Can I control the output's aspect ratio or camera angle? No. Both are inherited directly from your source video. If you need a specific aspect ratio or camera move, that's a job for a text-to-video or image-to-video model like Seedance, Kling, or VEO instead.
What happens if a generation fails partway through? You're not charged for it. Credits are deducted upfront when you hit generate, but if the render fails on the provider's end, the charge is refunded automatically and the job shows up in your history marked as failed with an error message, not a silent loss.
Motion transfer isn't trying to replace your main video generator. It's the tool you reach for once you already have a character worth reusing and a performance worth borrowing. Build the face in Character Studio, find (or shoot) a source clip with the motion you want, and let AnimateA.I. do the part that used to require a rig, a mocap suit, or an animator. Start with a short 720p test in Create Video; at 6 to 10 credits a clip, it costs less to try than to keep wondering whether it'll work for your use case.