You finally get the shot. Your AI character is holding the serum bottle at exactly the angle you wanted, the label is crisp, the lighting is right. You save it, close the tab, and come back tomorrow to make five more for the week's content calendar. None of them match. The cap is a different color. The label font shifted. The bottle got a little taller and lost its cork stopper. Your "brand" now looks like five different products.
That's not a fluke. That's how every text-to-image and character-reference model behaves by default: it re-imagines the object from scratch on every single generation unless you give it something to hold onto. Most people fight this by writing longer and longer prompts ("the exact same amber glass bottle with a black dropper cap and gold foil label that says..."), which helps a little and fails a lot, because a paragraph of adjectives isn't a reference. It's a description, and descriptions drift.
The actual fix is boring and it works: stop re-describing the product every time and give the model a real, reusable reference instead. That's what the Assets library in Character Studio is for, and this guide walks through exactly how to use it.
Quick answer
Build the product, outfit, accessory, or prop once as a library Asset (a name, 3 to 7 reference photos, and an auto-extracted "DNA" profile of its shape, colors, materials, and label text). Attach that asset to any future character generation instead of re-uploading or re-describing it, pick a placement mode (in hand, in scene, being used, worn as an outfit, or worn as an accessory), and every image comes out holding, wearing, or using the same object. Building the asset is free. Generating with it costs the same 1 credit per image as any other Character Studio generation.
Why does the product change every generation in the first place?
Diffusion models don't have object permanence. Every time you hit generate, the model is synthesizing pixels from your prompt and whatever reference images you attached to that specific call. If your reference is a text description, the model is free to interpret "amber bottle with black cap" a slightly different way each time, because nothing in the pipeline is telling it "no, this specific bottle, the one from yesterday."
Character Studio already solves this for faces and bodies: your character has a persistent identity profile that carries across generations, which is why the same AI influencer looks like the same person in post after post. Products, outfits, and props never had that. Every time you wanted your character holding a specific item, you were re-uploading a photo of it or re-typing a description, and the model was reconstructing it from partial information each time. Small differences compound fast across a content calendar.
The fix isn't a smarter prompt. It's giving the object the same kind of persistent reference the character already gets.
The fix: build the object once as a library asset
An Asset in Character Studio is a saved, reusable reference for anything that isn't the character itself: a product, an outfit, an accessory, or a prop. You build it once from a handful of photos, and after that you attach it to as many generations as you want without re-uploading anything.
Under the hood, building an asset does two things in parallel:
- A vision pass reads your photos and extracts a structured profile (we call it "Asset DNA") covering shape and geometry, scale, primary and secondary colors, materials, finish, surface details, logo and label placement, and any visible text, preserved with exact case and spacing.
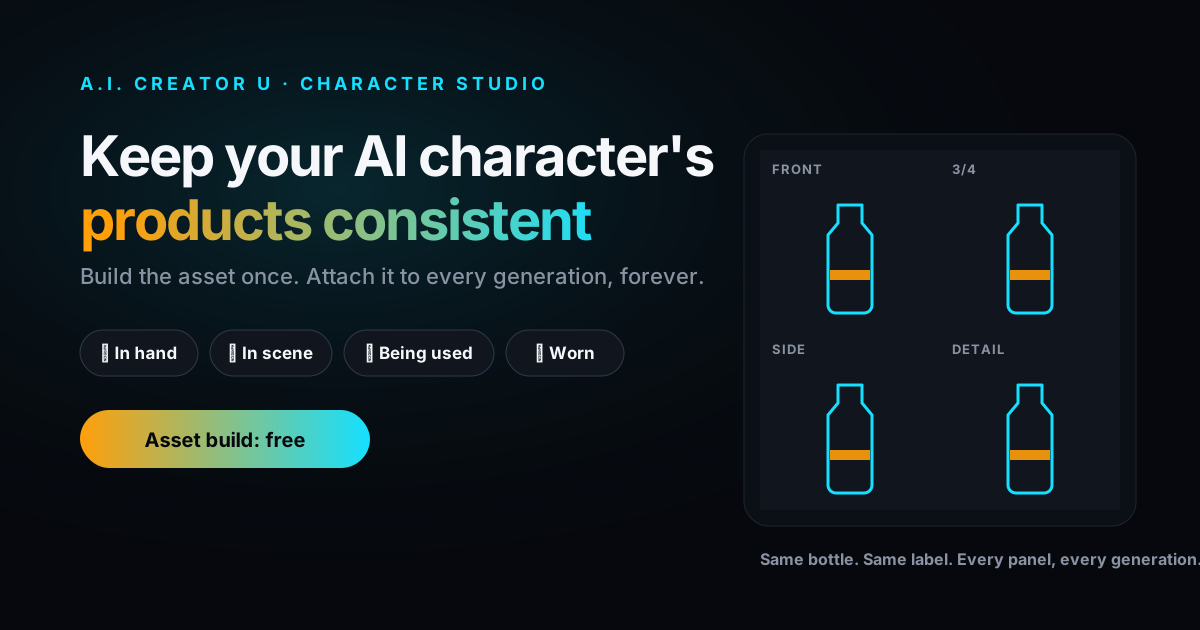
- A silent reference sheet gets generated in the background: a clean four-panel 2x2 grid showing the object from the front, three-quarter angle, side, and a close-up detail shot, all on a neutral studio backdrop. This sheet becomes an additional, cleaner reference the model can pull from alongside your original photos.
Both of those run for free. Nothing gets deducted from your credit balance until you actually generate an image with the asset attached.
Building an asset, step by step
Go to Assets (in your dashboard, under the same area as Character Studio) and click New Asset. The wizard is four steps:
Step 1: Name and type. Give it a name ("Vita Glow Serum," "Denim Jacket v2") and pick a type: product, outfit, accessory, or prop. Don't overthink this pick. The vision pass reviews it against your photos and can reclassify it automatically once it sees the images.
Step 2: Photos. Upload 3 to 5 photos minimum, up to a hard cap of 7. Different angles, clean background, bigger files are better. One photo works in a pinch, but the DNA extraction and the reference sheet both get noticeably more accurate with a few angles to triangulate from, especially for anything with a label or a logo.
Step 3: Build Asset. Click it and two things kick off at once: the vision analysis and the reference sheet generation. This takes a bit longer than a normal image generation (the interface walks you through status messages like "reading label and logos" and "locking asset DNA" while it works), because it's doing real analysis, not just a single image call.
Step 4: Review DNA. This is the step people skip and shouldn't. The extracted profile shows up as editable fields: category, scale, shape and geometry, primary and secondary colors, materials, finish, logo and label placement, visible text, distinctive features, and interaction rules. The vision pass is good but not psychic. If your label reads "Vita Glow" and it extracted "Vitaglow," fix it here. This field gets carried into every future generation, so five seconds of editing now saves you from a wrong label on every piece of content this asset ever appears in.
That's it. Click "Looks good" and the asset lands in your library, ready to attach.
What "Asset DNA" is actually doing
The DNA profile isn't decorative metadata. It gets compiled into the actual generation prompt every time you use the asset, as a dedicated block that tells the model to preserve the object's exact geometry, proportions, colors, materials, and label layout, and explicitly not to redesign, restyle, recolor, or invent new details. That's the mechanism that stops the slow drift you get from prompt-only descriptions.
There's also an accuracy setting working in the background: when the vision pass detects readable text or a branded label on your photos, it automatically flags the asset for "exact" accuracy priority, which adds a stricter fidelity instruction to the prompt on top of the DNA block. In practice this means branded products with visible text get the tightest possible lock on label accuracy without you having to configure anything, though it's still worth double-checking the visible text field yourself since that's the one detail a vision model is most likely to get slightly wrong.
Attaching an asset to a generation
Once an asset exists, using it in Character Studio is a single attach step in the image generator's toolbar, not a re-upload. Pick your asset from the library grid (or do a one-off "one-shot" upload if you just need it for a single image and don't want to save it to your library), and the tool auto-selects a sensible placement mode based on the asset's type. You can override that with a row of mode chips:
| Placement mode | What it does | Good for |
|---|---|---|
| In hand ✋ | Places the object naturally in your character's hand, with realistic grip, contact shadows, and scale | Product shots, holding a bottle, phone, or box up to camera |
| In scene 🎬 | Sets the object down in the environment (table, shelf, counter) without the character touching it | Flat-lay style shots, "on my desk" content, background product placement |
| Being used 🎯 | Shows the character actively using the object in an action | Applying a skincare product, using a gadget, playing an instrument |
| Worn (outfit) 👕 | Dresses the character in the garment, matched to their real body shape and proportions | Full outfits, dresses, jackets, athletic wear |
| Worn (accessory) 🕶️ | Places the accessory naturally on the character's body | Sunglasses, hats, watches, bags, jewelry |
The default is smart: outfits default to "worn," accessories default to "worn," and products and props default to "in hand." You only need to override it when you specifically want a product sitting in the scene instead of held, or a prop being actively used instead of just displayed.
Every generation still costs the standard 1 credit per image, same as any other Character Studio output. There's no surcharge for attaching an asset.
A realistic workflow: one skincare bottle, a full week of content
Say you're running content for a skincare brand and you need your AI spokesperson holding the same serum bottle across ten different posts this week: some product-only shots, some "applying it" demo shots, some lifestyle shots with the bottle just sitting on a bathroom counter.
Without an asset library, that's ten separate uploads or ten increasingly desperate prompt rewrites, and by post six the label has quietly drifted. With an asset built once, it's: attach asset, pick "In hand" for the product shots, switch to "Being used" for the demo shots, switch to "In scene" for the lifestyle shots, and write a normal prompt for each ("she's smiling under soft morning light" or "flat lay on a marble counter next to a folded towel"). The object stays locked. Only the scene, pose, and lighting change, because that's the only thing you're actually asking the model to vary.
This is also where the type filter and search on the Assets page earn their keep once your library grows past a handful of items: filter to "product" when you're building this week's skincare content, filter to "outfit" when you're doing a fashion drop, and pin the ones you use constantly so they sit at the top of the grid.
Where this fits next to everything else in Character Studio
It's worth being clear about what Assets is and isn't. It handles the object your character interacts with: the product, the outfit, the prop. It does not handle the character's own face, body, or identity, that's what Character Studio's core reference system already does, and it's a separate (and separately solved) problem. If you haven't built a consistent AI character yet, that's the piece to sort out first; our guide to building an AI character that doesn't drift covers the identity side, and if you're building a full AI persona to post as, the AI influencer generator guide walks through that end to end. If you're still mapping out the bigger picture, meaning how a consistent character and a consistent product library fit into a whole content strategy without ever showing your own face, our Faceless Content Playbook is the pillar guide that ties all of it together.
Assets also isn't the same tool as Studio Zero's Try-On feature, which is built for the opposite direction: taking a product you already have real photos of and putting it on stock or AI models for e-commerce listings. If that's closer to your use case, see our AI virtual try-on guide. Assets is for when the product needs to travel with your character, across your content, indefinitely.
From a consistent still to a consistent video
Right now, Assets attaches to Character Studio's image generator, not directly to video generation. That's not a limitation you can't work around, it's just the current shape of the tool: build the still with the exact product in the exact placement you want, then feed that finished image into Create Video as a starting frame for image-to-video generation. You get a consistent object and a moving shot, you just do it in two steps instead of one. Our image-to-video walkthrough covers that hand-off in detail if you want the full workflow from still to clip.
The honest opinion
Most complaints about "AI can't keep products consistent" aren't actually a model-quality problem, they're a workflow problem: people are asking a generative model to remember something across sessions using nothing but a sentence. No image model does that reliably, ours included, no matter how good the prompt is. The moment you give it an actual reference object instead of a description of one, the "drift" problem mostly disappears, because you've stopped asking it to guess.
FAQ
Do I need a separate asset for every color variant of the same product? Yes, if the color is part of what needs to stay exact. The DNA profile locks in the specific colors from your reference photos, so a red bottle and a blue bottle of the same product are two different assets. If the packaging is otherwise identical, duplicating the wizard takes about two minutes.
How many reference photos do I actually need? One works, but three to five is the sweet spot the tool recommends, and it matters more for anything with text or a logo. More angles give the vision pass more to triangulate the shape and label placement from, and give the reference sheet cleaner source material.
Does building an asset cost credits? No. Both the DNA analysis and the four-panel reference sheet generation are free. You're only charged the standard 1 credit per image when you actually generate a character image with the asset attached.
Can I use an asset without saving it to my library? Yes, the toolbar has a one-shot upload option for a single generation. It skips DNA extraction and the reference sheet, so it won't be quite as consistent across repeated use, but it's there for when you genuinely only need the object once.
What if the AI gets the label text wrong? Fix it in the DNA review step before you save the asset. The visible text field is copied verbatim into every future generation's prompt, so a typo there repeats itself in every image until you go back and correct it in the asset's settings.
Build it once, use it forever
The bottle, the jacket, the mic, whatever it is, you shouldn't have to re-teach the model what it looks like every single time you generate. Build it as an asset once, attach it wherever you need it, and spend your prompt budget on the part that's actually supposed to change: the scene. Start building your character and asset library and see what a full week of consistent content actually looks like.